About Lesson
Zone-Based Firewall (ZBFW)
how to configure and verify stateful firewall functionality on IOS routers.
- Cisco Zone-Based Firewall (ZBFW) is the latest integrated stateful firewall technology included in IOS.
- ZBFW uses a flexible and straightforward approach to providing security by establishing security zones.
- A zone establishes a security border on the network and defines acceptable traffic that is allowed to pass between zones.
- By default, interfaces in the same security zone can communicate freely with each other, but interfaces in different zones cannot communicate with each other.
The Self & Default Zones
- The self zone is a system-level zone and includes all the routers’ IP addresses. By default, traffic to and from this zone is permitted to support management (for example, SSH protocol, SNMP) and control plane (for example, EIGRP, BGP) functions. After a policy is applied to the self zone and another security zone, interzone communication must be explicitly defined.
- The default zone is a system-level zone, and any interface that is not a member of another security zone is placed in this zone automatically. Upon initialization of this zone, any interface not associated to a security zone is placed in this zone. When the unassigned interfaces are in the default zone, a policy map can be created between the two security zones.
ZBFW Configuration
ZBFW is configured in five steps:
- Step 1. Configure the security zones by using the command zone security zone-name. A zone needs to be created for the outside zone (the Internet). The self zone is defined automatically.

ZBFW Configuration (Cont.)
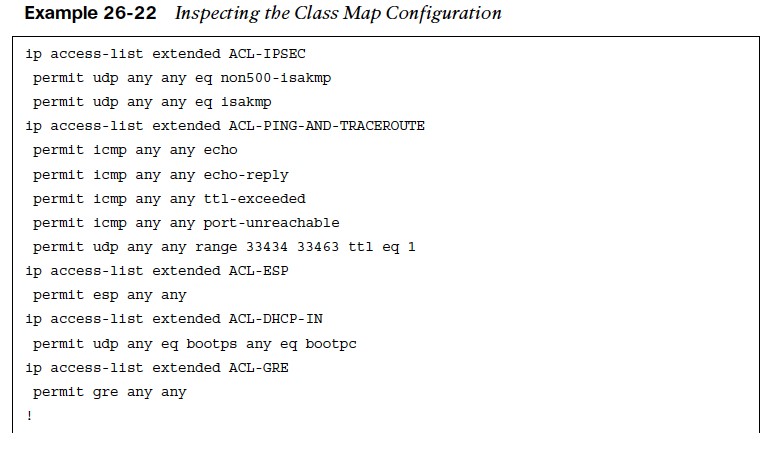
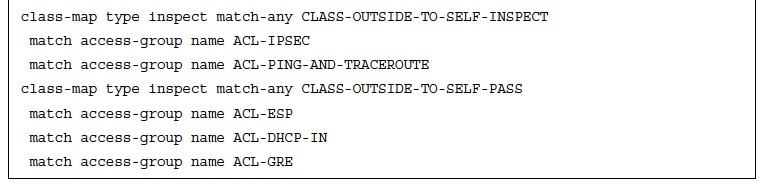
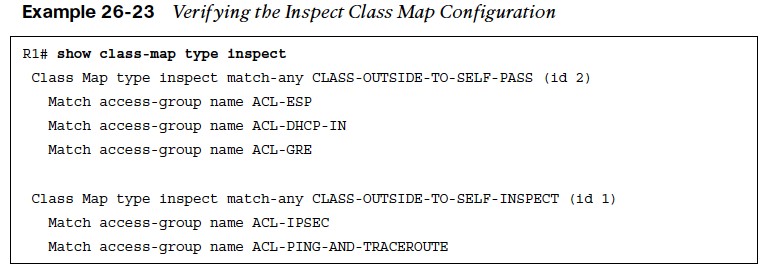
- Step 2. Define the inspection class map. The class map for inspection defines a method for classification of traffic. The class map is configured using the command classmap type inspect [match-all | match-any] class-name.
- Step 3. Define the inspection policy map, which applies firewall policy actions to the class maps defined in the policy map.
The policy map is then associated to a zone pair. The inspection policy map is defined with the command policy-map type inspect policy-name. After the policy map is defined, the various class maps are defined with the command class type inspect class-name. Under the class map, the firewall action is defined with these commands:
- drop [log]: This default action silently discards packets that match the class map. The log keyword adds syslog information that includes source and destination information (IP address, port, and protocol).
- pass [log]: This action makes the router forward packets from the source zone to the destination zone. Packets are forwarded in only one direction. A policy must be applied for traffic to be forwarded in the opposite direction. The pass action is useful for protocols like IPsec, Encapsulating Security Payload (ESP), and other inherently secure protocols with predictable behavior. The optional log keyword adds syslog information that includes the source and destination information.
- inspect: The inspect action offers state-based traffic control. The router maintains connection/session information and permits return traffic from the destination zone without
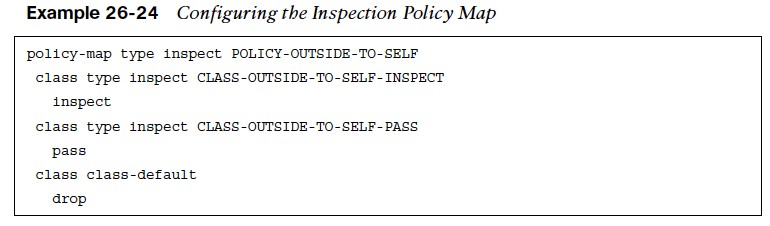
- Notice that in the class default class, the drop command does not include the log keyword because of the potential to fill up the syslog.
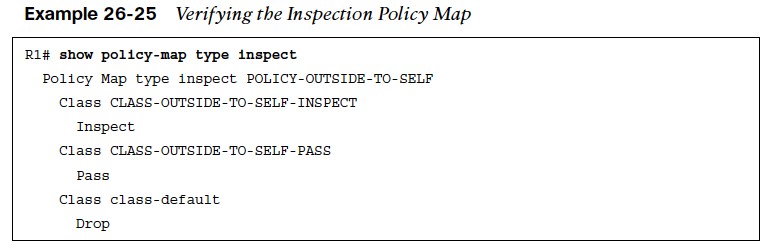
- The inspection policy map can be verified with the command show policy-map type inspect [policyname]
- Step 4. Apply a policy map to a traffic flow source to a destination by using the command zone-pair security zone-pair-name source source-zone-name destination destination-zone-name. The inspection policy map is then applied to the zone pair with the command service-policy type inspect policy-name. Traffic is statefully inspected between the source and destination, and return traffic is allowed.
- Example 26-26 defines the zone pairs and associates the policy map to the zone pair.

- Step 5. Apply the security zones to the appropriate interfaces. An interface is assigned to the appropriate zone by entering the interface configuration submode with the command interface interface-id and associating the interface to the correct zone with the command zone-member security zone-name, as defined in step 1.

Verifying the Outside-to-Self Policy
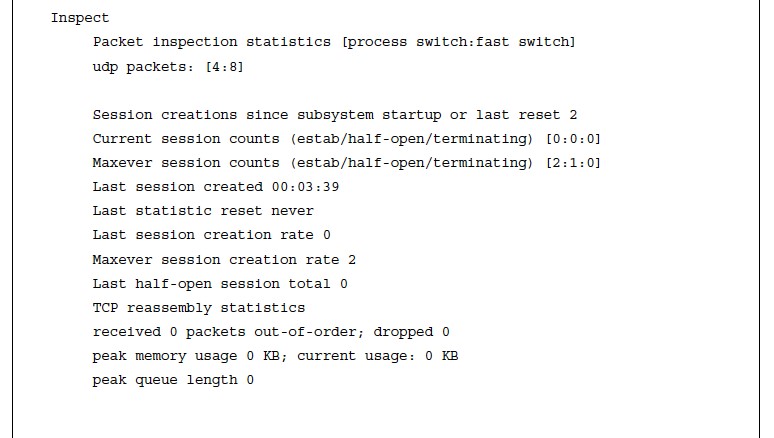
- Now that the outside-to-self policy has been fully defined, traffic statistics can be viewed with the command show policy-map type inspect zone-pair [zone-pair-name].

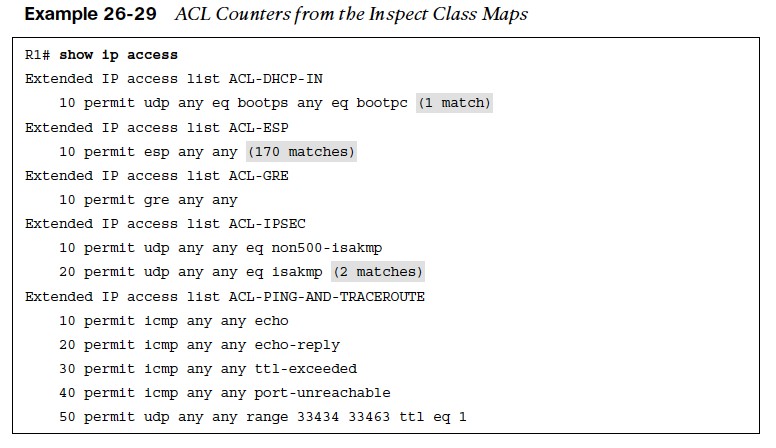
ACL Counters from the Inspect Class Maps
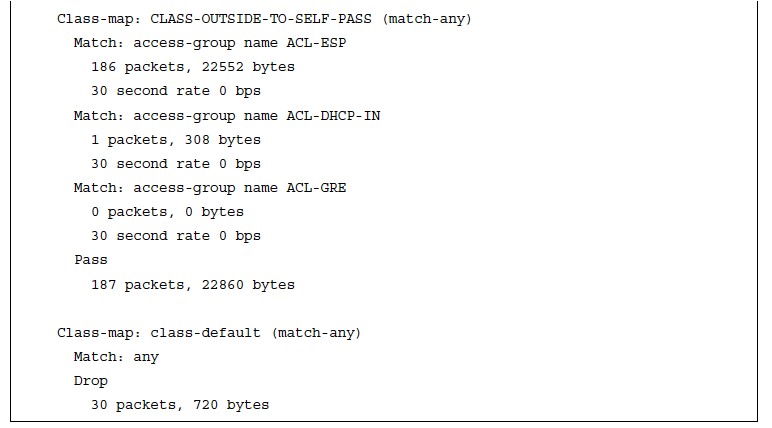
- Even though the ACLs are not used for blocking traffic, the counters do increase as packets match the ACL entries for the inspect class maps, as demonstrated in Example 26-29.
Verifying ZBFW
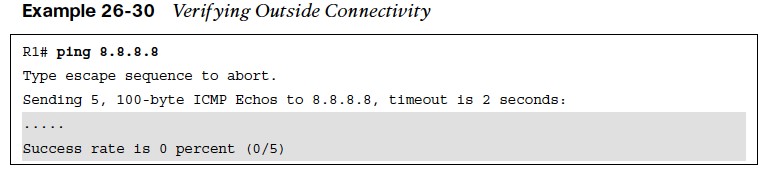
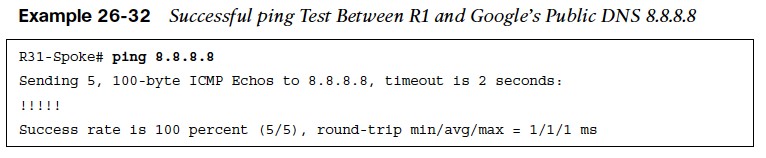
- After the outside-to-self policy has been defined, it is time to verify connectivity to the internet, as shown in Example 26-30. Notice here that a simple ping from R1 to one of Google’s Public DNS IP addresses 8.8.8.8 is failing.
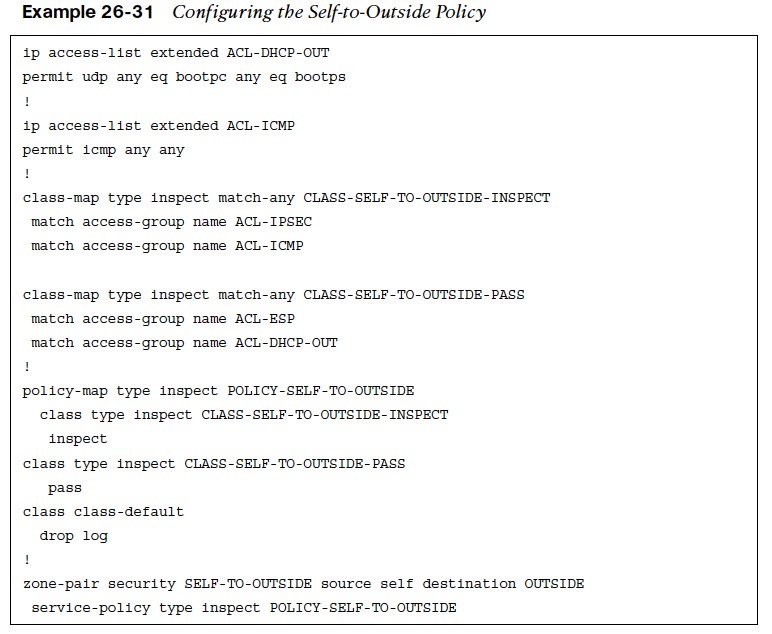
Configuring the Self-to-Outside Policy
- The reason for the packet failure is that the router needs to allow locally originated packets with a self-to-outside policy. Example 26-31 demonstrates the configuration for the self-to-outside policy. ACL-IPSEC and ACL-ESP are reused from the outside-to-self policy. Now that the second policy has been configured, R1 can successfully ping 8.8.8.8, as shown in Example 26-32.
Other useful information:
Join the conversation